Zoom In on an Image with AI

Turn a wider photo into a closer composition. Upload your reference, move Distance toward Close, and generate a new image that brings your subject forward.

0°
FrontRightBackLeft
0°
LowEyeElevatedHighTop
10.0
WideMediumClose
AI illustration of a woman in a cream sweater, shown waist-up and in a closer portrait

AI concept illustration · results vary

Bring the Details of Your Image Closer

Explore tighter framing for portraits, product concepts, and character references. Keep the viewpoint steady when you want to compare distance alone.

Frame a More Personal Portrait

Move from a waist-up composition toward a head-and-shoulders view. Give the face more space in the frame while using the source to guide identity and lighting. Compare facial features with the original before keeping a result. Choose a source with both eyes visible and some space above the head. A very tight source leaves less room to compare framing. If the face changes too much, try a medium distance setting and check the eyes, hairline, and accessories separately.

Zoom In Image
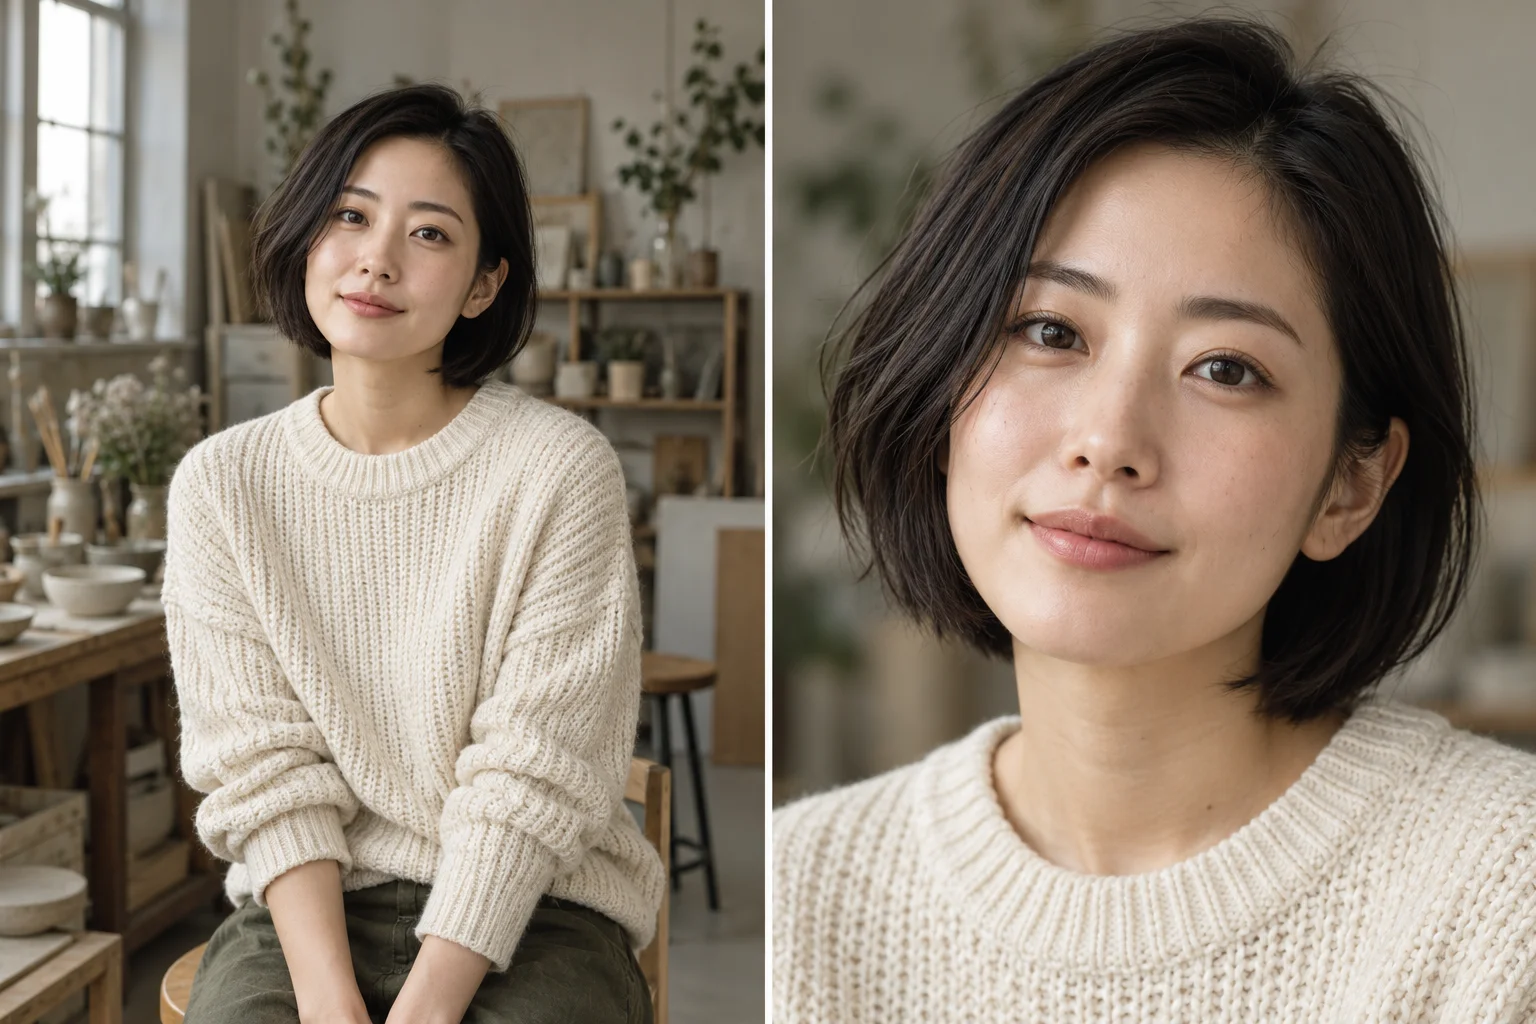
AI illustration of a woman in a cream sweater, shown waist-up and in a closer portrait

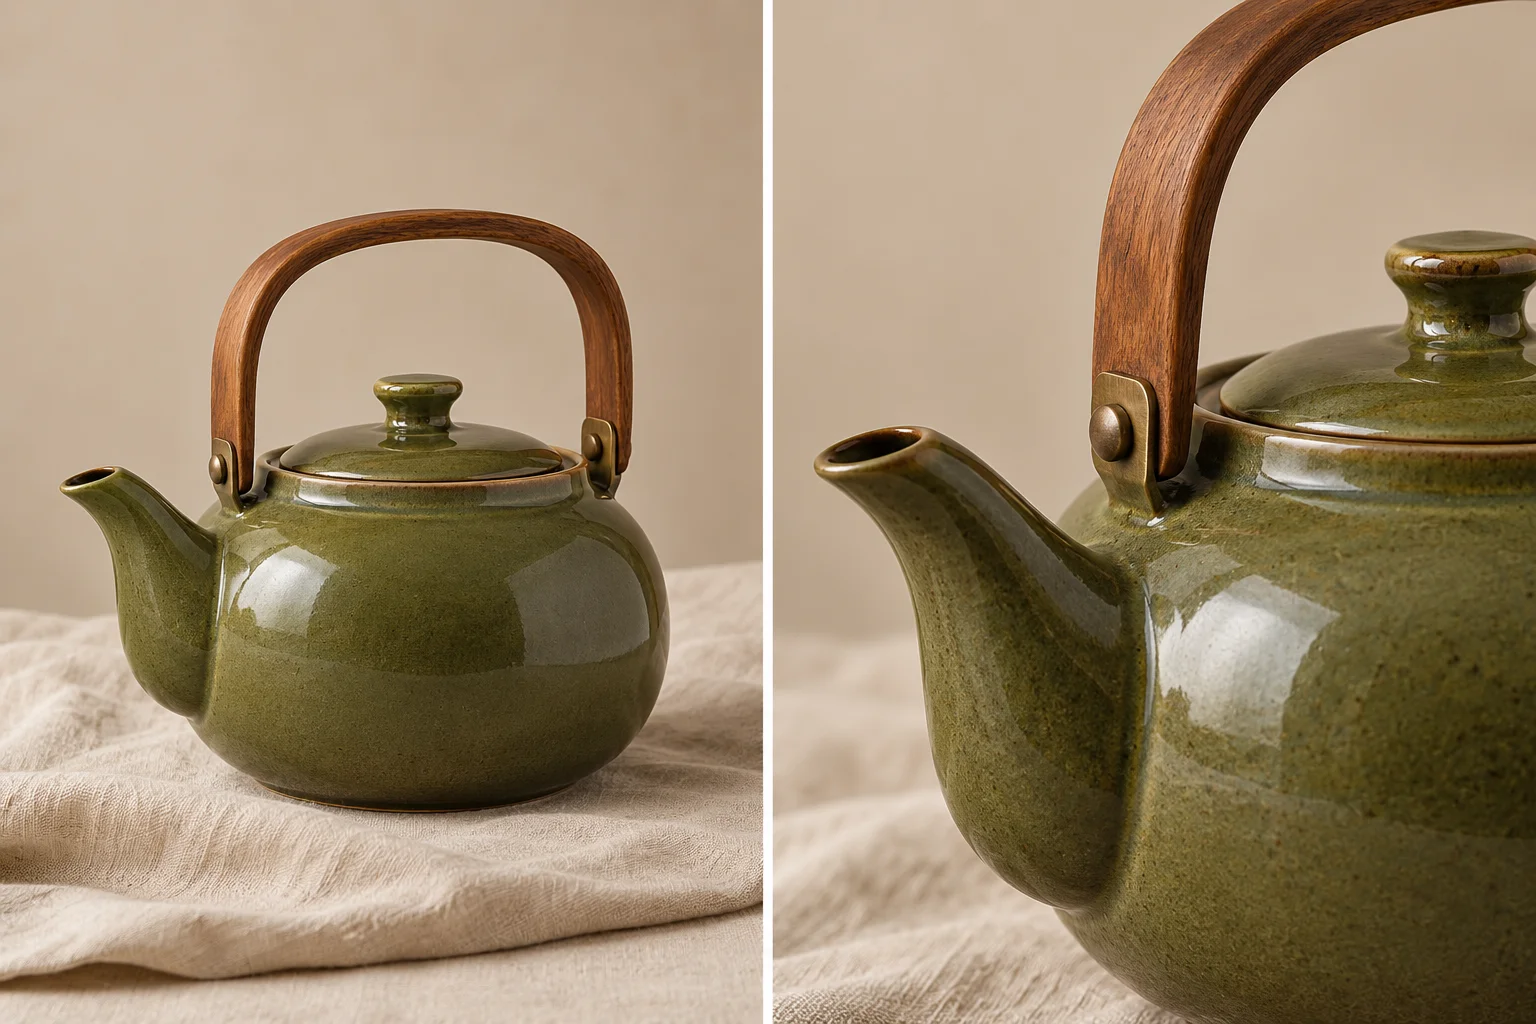
Focus on a Product Detail

Bring the handle, glaze, or silhouette of a product into focus for a visual concept. A closer generated view can reinterpret small details; use the real product to verify labels, texture, and construction. Start with one clearly separated object against an uncluttered background. Keep the feature you care about visible in the source. The result is useful for planning where attention should go, but a generated close-up cannot confirm a material finish or a printed specification.

Zoom In Image
AI illustration of a green ceramic teapot in a wider product view and a tighter detail composition

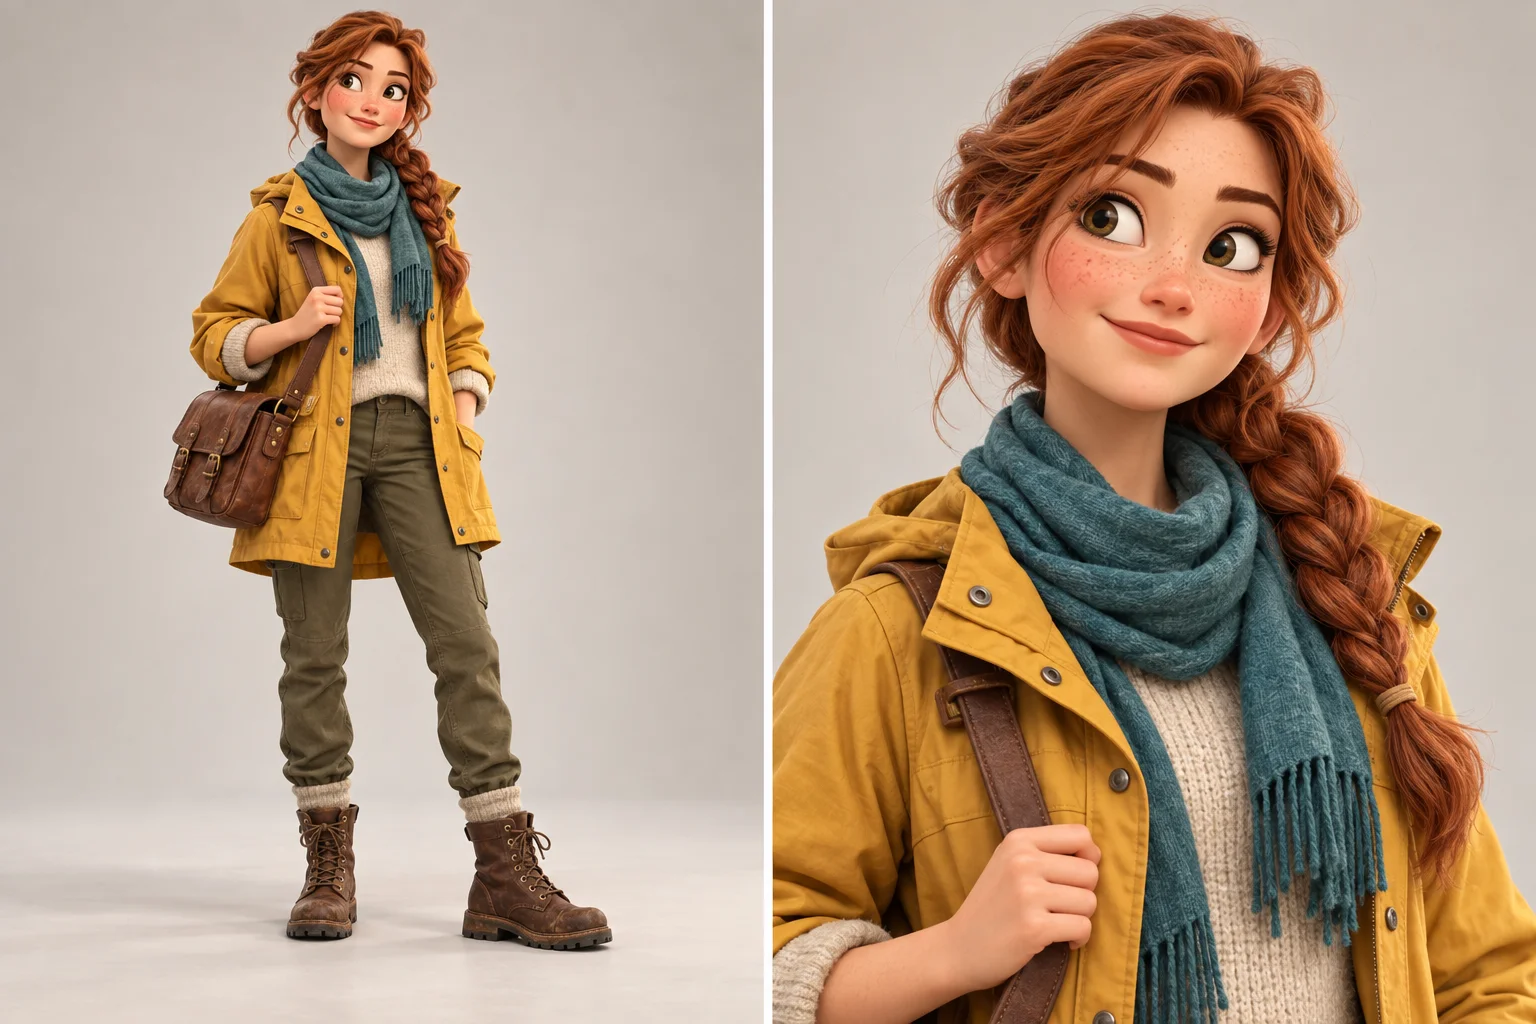
Study a Character Up Close

Explore an upper-body reference from a full-body character image. Use the closer composition to discuss hair, expression, and costume details, then check that the design remains consistent with the original. Keep the original beside the result and compare colors, costume seams, and the number of accessories. A close-up is one view of a design, not a complete reference sheet. Use Character Turnaround when your next task requires front, side, and back views.

Zoom In Image
AI illustration comparing a full-body adventurer character with a close upper-body view

AI-generated composition illustrations, not verified outputs from this tool. Actual results vary.

Choose What Your Close-Up Should Show

Portrait Composition

Explore head-and-shoulders framing for a portrait study without asking for a different body pose. Center the person and leave room around the head and shoulders. This is useful for comparing visual emphasis; it does not promise an exact preservation of facial features or the original pixels.

Product Concepts

Try tighter framing around a product feature before planning a real detail photograph. Compare the amount of background around the object and whether the important feature is still visible. Use a real photograph when the image needs to document exact dimensions, labels, or construction.

Character Studies

Bring a character’s face and upper costume forward for illustration and design discussions. Adjust distance before changing the angle. This keeps the comparison focused and makes it easier to notice unintended changes to the character design.

How to Zoom In on a Photo

Move from a wider view to a closer frame
  1. 1Wide framing
  2. 2Medium framing
  3. 3Close framing
  1. 1

    Upload a Clear Image

    Choose a JPG, PNG, or WebP photo with the subject and the details you want to emphasize clearly visible. Avoid severe blur, clipped highlights, and objects covering the subject. A single-subject image is easier to direct than a group photo. Keep an unedited copy so that you can compare any newly generated detail with the source.

  2. 2

    Choose Closer Framing

    The workspace starts at Close. Adjust Distance to compare a gentler zoom in, and leave Horizontal and Vertical steady to focus on framing. Try Medium before Close if you are unsure how much space the subject needs. The control changes overall framing; it does not select a particular patch of pixels. A subject near the edge may need a better-centered reference first.

  3. 3

    Generate and Review

    Sign in, check the displayed generation charge, and create the image. Compare faces, textures, and edges with the source before downloading. If the result feels too tight, return to a medium setting or choose a reference with more space around the subject. Check small lettering and repeated patterns at full size, since a convincing thumbnail can hide changes in these details.

Create a Closer View of Your Image

Choose a clear reference and explore a tighter composition with camera distance controls.

Zoom In Image

Zoom In Image FAQ

How does AI image zoom in work?

The source photo guides a new image with a closer camera-distance setting. It generates a new composition rather than just making the same pixels look larger on your screen. Background space and fine details can change as the scene is reinterpreted. Think of the output as an alternative composition to review, rather than a magnified copy of the original photograph.

Is this different from cropping or enlarging a photo?

Yes. Cropping removes the outer part of an image, while resizing changes its pixel dimensions. This tool generates a closer interpretation of the scene, so details may change. Use a crop tool if you need to preserve the original pixels. For exact product text or an archival photograph, ordinary cropping is usually the appropriate choice. Use generated framing when exploring a new composition matters more than retaining every original pixel.

Can it recover details from a blurry image?

It cannot reliably recover information that was never visible. AI may invent textures, small lettering, or facial detail. Start with a sharp image and do not treat the result as evidence of hidden detail. A sharp-looking output can still contain invented detail. For identification, inspection, or any decision that depends on what was actually photographed, keep using the original source.

Can I zoom in on a specific part of my photo?

Distance controls overall camera framing; this workspace does not include a click-to-select region or crop box. Use a source centered on the subject you want to emphasize. Keep important details visible in the original. If an exact region matters, prepare a crop in an image editor first. Make sure the crop still includes enough context to identify the subject and guide its appearance.

Does zoom in photo generation create a video?

No. This page generates a still image. For a moving push toward a face, use Face Zoom Filter; for movement ending at an eye, use Eye Zoom.

Can I change the angle as well as the distance?

Yes. Horizontal and Vertical adjust the viewpoint, while Distance changes close or wide framing. Change one control at a time so you can compare the effect of each setting. Keep the source image and compare one result at a time. Establish a comfortable distance first, then explore a different viewpoint if the composition still needs adjustment.