Camera Angle Prompts for AI Images
Write camera angle prompts for AI images using six visual examples. Explore portrait angles, wider framing, and the difference between angles and movement.
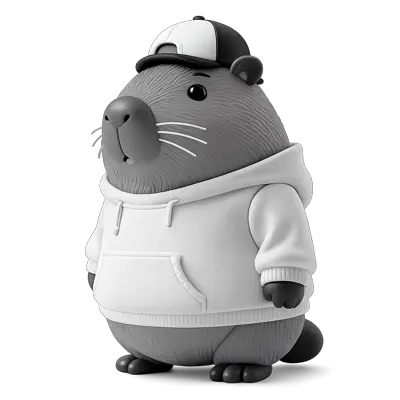
A different viewpoint changes what an image communicates. A low angle can make a small character feel imposing; a side view can reveal a silhouette; a wider composition gives the subject room to breathe. This guide explains camera angles for AI through practical examples you can adapt to a reference image.
Start with one clear viewpoint, describe the framing, and say which subject details should stay consistent. Then review the result before adding more instructions.
A simple structure for camera angle prompts
Use four parts: subject + viewpoint + framing + details to preserve. Describe the position of the camera relative to the subject instead of asking vaguely for a “more cinematic angle.”
Show the same character from a front-right three-quarter view, with the camera at eye level and the whole body in frame. Preserve the character's clothing, colors, proportions, and neutral studio background.
This is a starting prompt, not a guarantee of an exact camera position. AI image editing reconstructs a view from a reference; it may change small details or invent surfaces that the original image does not show. Compare the face, outfit, silhouette, and background when choosing a result.
Six camera angles for AI images
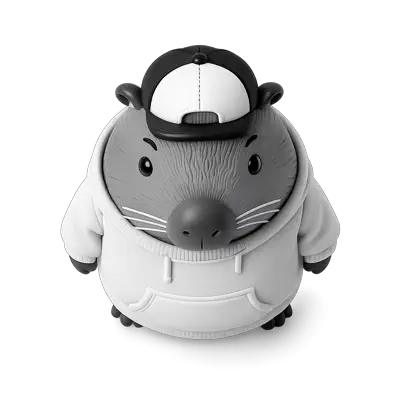
The illustrations below make the viewpoints easier to compare. They are visual references, not a record of verified outputs from the prompts in this guide.
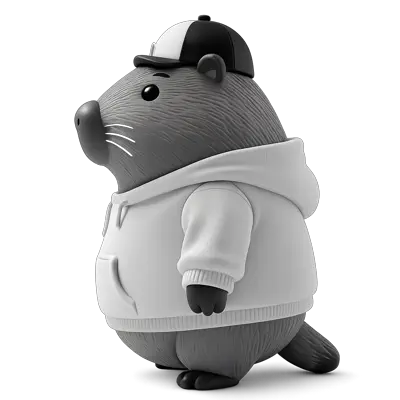
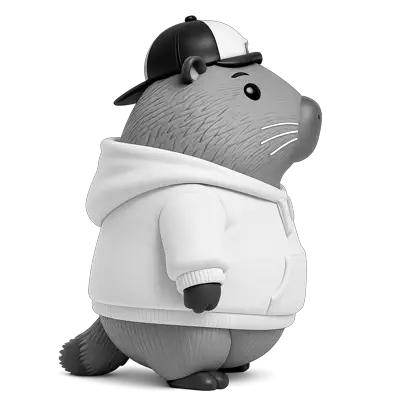
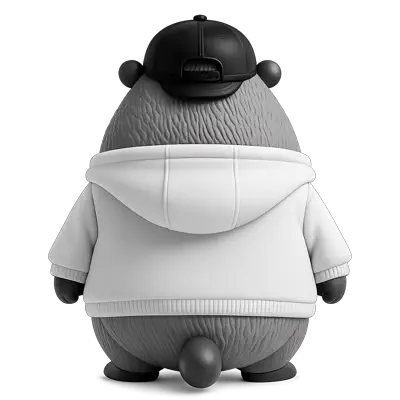
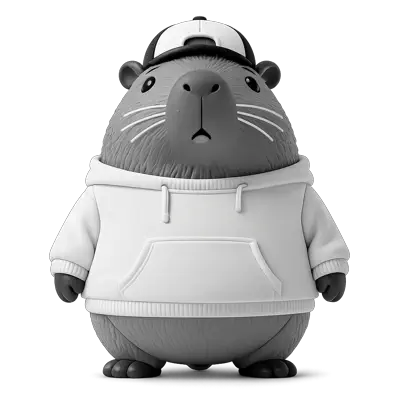
1. Front-right three-quarter view
A three-quarter view shows both the front and one side of the subject. It is useful when you want more depth than a straight-on image while keeping the face or main product features readable.
Reframe the same character from a front-right three-quarter view at eye level. Keep the full body centered, with the same clothing, facial features, and background.
If the result faces the wrong way, make the visible side explicit. Descriptions such as “show the subject's right cheek” can be clearer than a bare instruction to “turn right.”
2. Right-side view
A side view emphasizes the outline. For a portrait, it shows the profile; for a product, it reveals depth and side details that may be hidden in the original.
Show a right-side profile of the same character. Position the camera beside the subject at eye level. Keep the entire silhouette visible and preserve the clothing and proportions.
Check details that become newly visible. One reference image cannot establish exactly what is on an unseen side.
3. Left-side view
Use a separate left-side instruction when direction matters. This is especially useful for asymmetrical subjects with a bag, a hair part, a logo, or a distinctive accessory.
Show the same character from its left side, at eye level, with the full body in frame. Preserve the outfit and keep accessories on their original side of the body.
Do not assume a left-side result should simply mirror a right-side result. Inspect asymmetric features rather than relying on the overall pose alone.
4. Back view
A back view can help develop a character reference or plan a rear-facing shot. It also asks the model to infer more unseen information than a small angle change.
Show a rear view of the same character, with the camera at shoulder height and the full body visible. Keep the outfit, colors, body shape, and studio lighting consistent.
For production assets, use additional reference images where possible. A plausible invented back design may still differ from the design you intended.
5. Low angle
A low camera position looks upward toward the subject. Use it to explore a stronger silhouette or emphasize scale. Start with a modest angle so the subject remains recognizable.
Place the camera below the character's eye level and look slightly upward. Keep the full body visible, preserve the face and outfit, and use a restrained perspective.
If the subject becomes stretched, reduce the strength of the angle. “Slightly below eye level” is a more controlled starting point than “extreme worm's-eye view.”
6. Top-down view
A top-down view looks downward from above. It can reveal the arrangement of objects, the top of a product, or the relationship between a subject and the floor around it.
View the same character from above, looking downward toward the head and shoulders. Keep the whole character in frame and preserve the outfit, colors, and neutral background.
Distinguish “slightly elevated” from “directly overhead.” These produce different compositions, so choose the description that matches your intended shot.
Camera angle prompts for portraits
For a face, begin with a small change and a clear framing instruction. A three-quarter view is a practical first experiment before moving to a complete profile.
Create a three-quarter portrait of the same adult person, with the subject's right cheek more visible. Keep the camera at eye level and retain the hairstyle, expression, clothing, and soft lighting.
Show the same adult person in a clean left-side profile. Keep the head and shoulders in frame, with a neutral expression and the original background.
Review identity-sensitive details such as the eyes, nose, jawline, and hairstyle. For a focused portrait workflow, use the face angle changer. Treat a generated profile as a creative interpretation, especially when the source does not show that side of the face.
Wider framing is different from changing the angle
You can ask for more of the scene without changing which side of the subject you see. Describe the additional space and the elements that should remain anchored.
Create a wider composition around the same subject. Keep the original viewpoint and the subject centered, add natural surrounding space, and preserve the lighting and overall scene.
For a portrait, specify whether you want a waist-up or full-body composition. For a product, ask for breathing room around the object. For architecture, describe the surrounding setting that should be visible. A wider result can require invented content beyond the original edges; inspect it rather than assuming those details are factual.
Explore the zoom out image tool when your main goal is wider framing rather than a new side of the subject.
Camera angles and camera movement are different instructions
A camera angle describes a viewpoint in an image. Camera movement describes how the viewpoint changes over time in a shot. Keep the two tasks separate when writing a prompt.
- Image angle: “Show a three-quarter view at eye level.” This describes one composition.
- Dolly movement: “Move the camera slowly toward the subject.” This describes a change in position over time.
- Orbit movement: “Move around the subject along a smooth arc.” This describes a changing viewpoint through a sequence.
- Zoom instruction: Specify whether you mean a wider still image or a lens-style change during a video, since the word can mean either in an AI workflow.
If you are planning a moving shot, explore the examples on AI camera movement. For a single new viewpoint, start with 3D camera control.
How to improve a camera angle prompt
- Start with a clear reference. Choose an image where the subject is easy to distinguish from the background. Avoid asking the model to recover important details hidden by heavy occlusion.
- Change one thing first. Try the angle before adding a new setting, outfit, pose, or lighting style. This makes the result easier to judge.
- Choose a concrete frame. Say “head and shoulders,” “full body,” or “entire product with space around it.”
- Resolve conflicting directions. “Front view” and “full side profile” should not describe the same final image. Pick one target view.
- Check the result against the reference. Look for changed proportions, mirrored accessories, missing features, and invented background details.
- Refine the smallest useful instruction. If only the framing is wrong, adjust the framing rather than rewriting the entire prompt.
Frequently asked questions
What are the best camera angles for AI portraits?
There is no single best angle for every face or purpose. Eye-level front views, three-quarter views, and side profiles are useful starting points because their differences are easy to describe and compare. Start with the angle that suits the portrait you want to create.
Do camera angle prompts work the same in every model?
No. Models and editing tools can interpret the same wording differently. Use these prompts as starting descriptions, keep a reference image where the tool supports one, and refine the output through comparison. A prompt cannot guarantee identity or exact geometry.
Can I specify a precise number of degrees?
You can include a degree value as guidance, but a text description alone does not enforce a measured 3D camera rotation. If the tool offers angle controls, use those controls and verify the resulting view visually.
Should I include camera lens details?
Only when they help describe the intended perspective or framing. A short, clear viewpoint instruction is a better first experiment than a long list of camera and lens terms that may conflict with one another.
Start with a reference image, choose one viewpoint, and compare the composition. Explore 3D camera control, try a new portrait angle, or make room with wider framing.