Character Reference Sheet vs Turnaround: What to Include
Compare a character reference sheet with a turnaround, choose the views your project needs, and use a practical checklist to review an AI-generated design.
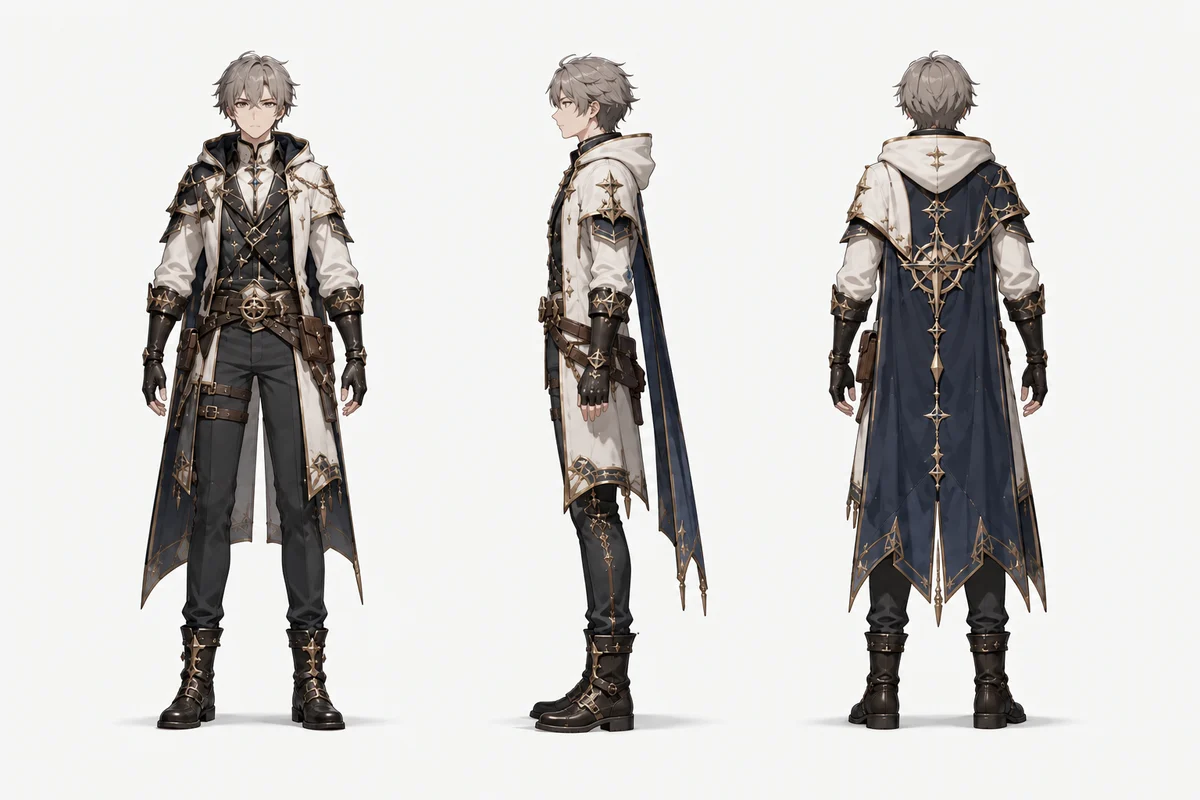
A character turnaround shows the same design from different directions. A character reference sheet can include those views plus expressions, colors, accessories, and notes. The terms overlap, but the deliverable you need depends on what the next person will do with it.
If you need to inspect the front, side, and back, start with a turnaround. If an illustrator or animator also needs to understand expressions and small design rules, plan a broader reference sheet. The Character Turnaround tool helps explore the multi-angle image portion; it does not automatically produce every element of a complete design package.
What a turnaround sheet answers
A turnaround answers a spatial question: what does this character look like from another side? A front view shows the face and costume arrangement. A side view helps explain the silhouette and depth. A back view describes hair, clothing, and accessories that the front cannot show.
Use the same neutral pose, comparable framing, and a simple background when you want to compare these views. An action pose can be expressive, but it also makes it harder to tell whether a difference comes from movement or from a changed design.
What belongs in a character reference sheet
A useful sheet gives the reader enough information for the next task. It does not need to include every possible expression or angle.
- Core views: front, side, back, and a three-quarter view where it clarifies the design.
- Important details: hair structure, fastening points, jewelry, footwear, or a distinctive prop.
- Color decisions: approved colors and material notes added deliberately, rather than inferred from changing lighting.
- Expression or pose references: separate examples when acting or body language matters.
- Design notes: short rules such as “satchel stays on the left hip” or “the jacket has three visible buttons.”
A turnaround can sit inside this larger document. Add expressions or labeled color swatches with your drawing or layout workflow; do not assume a multi-view image already supplies them accurately.
Choose the deliverable for the next task
For an illustration brief, a strong three-quarter view and a few close details may be more useful than a crowded sheet. Tell the artist which features are essential and which can change.
For modeling reference, compare front, side, and back views at similar scale. Check head size, shoulder width, limb length, and costume construction. AI views are visual guidance, not measured orthographic drawings or a ready-made mesh.
For animation planning, keep the neutral design reference separate from performance studies. Use AI Pose Changer to explore a body position, then compare it with the approved design. A generated pose is not a rig or an animated sequence.
For facial orientation, the Face Angle Changer offers a more focused portrait workflow. Changing which side of the face you see is different from designing a new expression.
A practical workflow from one reference image
- Choose a clear source showing the full character, including shoes and accessories that matter.
- Decide whether you need a full sheet for comparison or a single view for one missing direction.
- Describe the pose, framing, background, and the few details that should remain consistent.
- Generate a draft and compare it with the source before adding further variations.
- Correct disagreements, then assemble approved images and your own notes into the final reference document.
A starting description might be:
Show the same character in front, side, and back views on a plain background. Use a neutral standing pose and comparable full-body framing. Preserve the mustard coat, teal scarf, braid, and satchel on the character’s left hip.
This is a suggested brief, not a tested promise of exact results. For more ways to describe direction, use the camera angle prompt guide.
Review the sheet before sharing it
Look for changes that a viewer might miss at first glance: a bag switching sides, a different number of buckles, shorter sleeves, or a braid disappearing in the back view. Compare eye shape and hairline as well as the overall silhouette.
Also check whether the neutral pose remains comparable. A turned shoulder or bent knee can make proportions difficult to judge. If one view disagrees with the others, revise that view rather than treating all generated images as equally authoritative.
A hidden surface is especially uncertain. A plausible rear costume design is still an interpretation when the source only shows the front. Supply an approved back reference through a workflow that supports it, or specify the design manually before production.
Common questions
Is a character reference sheet the same as a model sheet?
People sometimes use these terms interchangeably. Agree on the required contents with the recipient: views, expressions, proportions, colors, and construction notes matter more than the label alone.
Do I always need four views?
No. Select the directions needed for your task. A single illustration may only need a clear three-quarter reference; a design handoff may need front, side, and back plus a detail view.
Can an AI turnaround go straight into production?
Treat it as a draft until you have checked and corrected the design. The image does not include editable geometry, separated layers, or rigging, and different views can disagree.
Use Character Turnaround for a sheet or single direction, then add approved expressions, colors, and design notes in your own layout.